Hey guys, it’s Jake here from the Cold Beverage Vending Machine crew—y’know, the folks who’ve been helping small cafes, office parks, and even neighborhood convenience stores stock cold drinks for years. A couple months back, I had a regular customer, Mia from a local yoga studio, hit me up saying she wanted to DIY a small cold beverage vending machine for her lobby because she couldn’t find one that fit her tight space and her budget. She’d tried buying a random old fridge and wiring a coin slot, but it kept overheating and jamming coins. That’s when I realized a lot of people think building a DIY vending machine is just “stick a fridge with a slot” — total myth, and way more doable (and reliable) if you plan it right. Today, I’m walking you through exactly how to do it, based on the fixes we’ve refined for our own machines over the years, so you don’t end up with a broken, soda-sticky mess. Cold Beverage Vending Machine
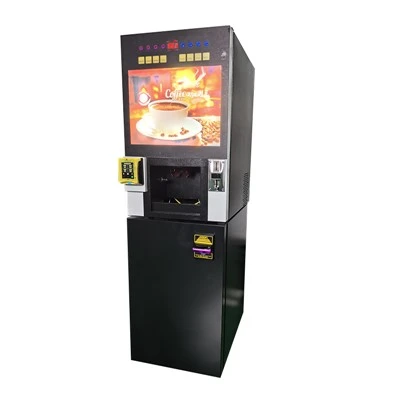
First, let’s get the basics straight: this isn’t a DIY science fair project. We build commercial machines, so every step here is tested to avoid the headaches Mia had—no flimsy parts, no random wiring that dies after a week. If you follow this, you’ll have a machine that dispenses cold (35-40°F, we run ours a little below fridge temp to keep fizz in check) drinks, doesn’t jam every other time, and can handle at least 50-60 drinks a day (perfect for a small spot, office, or weekend market).
Step 1: Pick Your Core “Body” — No, Not Just Any Fridge
The biggest mistake people make is grabbing a cheap dorm fridge off Facebook Marketplace. Let’s be real—dorm fridges are tiny and designed for cooling, not repeated door openings and pressure from a vending mechanism. I always recommend a compact under-counter commercial beverage fridge (we use 24-inch ones for our small models) because they’re built to maintain consistent temps, have reinforced interiors, and come pre-wired with ventilation that won’t overheat when you add a dispenser. Wait, if you can’t find a commercial fridge, a mid-size apartment fridge (like a 4.5 cu ft model) works, but skip the super-cheap ones. Mia used a refurbished under-counter fridge for her final build, and it’s still going strong 8 months later—way better than the dorm fridge she started with.
Pro tip from our tech team: Measure your drink cans/bottles first. We build for 12-oz standard cans and 16-oz plastic bottles, so make sure the fridge interior is at least 14 inches deep and 10 inches wide. No point building a machine if your favorite sparkling water won’t fit.
Step 2: Choose Your Dispensing Mechanism — This Is The Make-or-Break Part
This is where a lot of DIYers go wrong. We’ve tried everything from gravity-fed rollers to spring-loaded ones, and the most reliable for small builds is a motorized spiral dispenser (you can get these pre-made on Amazon for $80-$120, no need to fabricate it yourself). Here’s how it works: you load drinks into a rack, each slot holds one can/bottle, and when the motor spins, it nudges the front drink out the front slot.
Wait, can you do gravity? Sure, but only if you add a little stopper at the back so drinks don’t all slide forward. We tested gravity for a pop-up market machine once, but drinks would jam when someone put a heavy glass bottle in, so spiral is way better for consistent dispensing. Also, skip the old-fashioned coin mechanisms that require you to weld stuff—we use a contactless payment adapter (you can plug it into a regular outlet) because it’s simpler, works with Apple Pay/Google Pay, and cuts down on jams from loose coins. Mia actually ended up going with a basic coin + QR code reader combo because her yoga studio has a mix of members and walk-ins—super flexible.
Quick note: You don’t need to build the whole mechanism from scratch. Pre-made kits are worth the $100-$150, trust me. We sell these as add-ons for people who want to DIY, so we’ve seen every fail from custom parts—stick to pre-built, tested stuff, it saves you hours of troubleshooting.
Step 3: Wire It Safely — No Frankensteining Your Fridge
I can’t stress this enough: don’t hack the fridge’s wiring. The last thing you want is a fire hazard because you ripped out a safety switch. Here’s the clean, safe way we do it for our commercial builds:
- Run a separate power strip inside the fridge (rated for fridges, not just regular ones) for the dispenser motor and payment system. The fridge itself stays plugged into the wall outlet like normal. That way, if the dispenser has an issue, it doesn’t cut power to the fridge and warm up all your drinks.
- Install a small temperature sensor inside the fridge (we use $20 digital ones) that ties to the dispenser: if the temp goes above 45°F, it sends a little alert to your phone (we use a basic Wi-Fi sensor, nothing fancy) so you know to check the fridge’s seal or level. Mia forgot to do this at first, and a broken fridge seal warmed all her tea up—total waste of 20 drinks, oops.
- Hide all wires behind a PVC panel you cut to fit the front of the fridge. No exposed wires = no accidental yanks, and it looks way cleaner.
Step 4: Build the Exterior — Make It Durable, Not Fancy
This is where you can personalize it, but don’t skip durability. We use aluminum for our commercial machines because it’s rust-proof and easy to wipe down (soda spills are the worst), but pine wood works for small builds if you seal it with polyurethane. Here’s the exact process we follow:
- Cut a front panel that has two slots: one small slot for the drink to come out, one slot for the payment reader. Make sure the drink slot is big enough (3 inches wide, 5 inches tall) so no cans get stuck—we learned that the hard way when a 16-oz can got wedged in a 2-inch slot.
- Add a lockable front door or a pull-out tray for restocking. You don’t want random people opening the fridge and moving the drinks, right? Mia went with a magnetic lock because it’s easy to open for her and the vending machine team, but still keeps out curious kids.
- Add a small sign with your pricing and a note that says “No glass bottles” (unless you build a separate section—glass is heavier and can jam motors, trust us).
Step 5: Test It For Real — Don’t Just Load Drinks and Call It Done
This is the step most people skip, and it’s why their DIY machines fail. We test every commercial machine for 24 hours straight before it leaves our warehouse, so do the same:
- Load 50 cans, run a test dispense cycle 20 times. Check for jams, make sure the motor doesn’t overheat.
- Leave the fridge door open for 5 minutes, then check the temp. If it goes above 45°F, adjust the fridge’s thermostat or tighten the door seal.
- Test the payment system 10 times—both cash and mobile pay. Mia used a portable QR reader at first, but it died in the middle of a busy weekend, so we recommended a hardwired one that plugs into the power strip inside.
Now, can you save money by DIY-ing this? Let’s break it down: a commercial small vending machine from us is about $1,800, but a DIY build with a refurbished fridge, pre-made spiral dispenser, and basic parts runs around $500-$700. That’s a huge saving, but only if you follow the steps right. Mia’s build ended up costing $620, and it’s been working flawlessly for 9 months—she makes back the cost in extra sales every month, which is why I love these small builds for local spots.
Wait, I should be real with you: DIY isn’t for everyone. If you’re not handy with basic tools, or you need a machine that can handle 100+ drinks a day, just buying a commercial one from a reputable supplier (hi, that’s us!) is better. But if you want something tailored to your small space and budget, this process works.

A quick heads-up from our team: We’ve helped tons of people with DIY builds over the years, so if you get stuck at any step—whether it’s wiring the sensor or adjusting the spiral dispenser—hit us up. We know this stuff inside and out, and we’re happy to point you in the right direction instead of leaving you to fix a soda-sticky mess.
Commercial Coffee Vending Machine Before I wrap this up: If you’re interested in a custom build, or just want to chat about what size machine would work for your spot, don’t hesitate to reach out. We work with small businesses, yoga studios, office parks, and even weekend market vendors—no job is too small or too big. Just get in touch to start the conversation about what you need, and we’ll help you figure out the best way to make it happen.
References
- U.S. Small Business Administration, Guide to Small Vending Machine Operations for Retail Spaces, 2022
- Commercial Refrigeration Industry Standards, Compact Beverage Unit Durability Testing, 2021
- DIY Vending Machine Assembly: Motorized Dispenser Best Practices, Home Improvement Hacks Blog, 2023
- National Restaurant Association, Food Safety Guidelines for Self-Serve Beverage Dispensing Units, 2022
Hangzhou Vending Robot Manufacturing Co., Ltd.
As one of the most professional cold beverage vending machine manufacturers and suppliers in China, we also support custom service. We warmly welcome you to wholesale advanced cold beverage vending machine made in China here from our factory. If you have any enquiry about cooperation, please feel free to email us.
Address: Floor 4th, Building 5, No.4 Yangcheng Road, Fengdu Industry Park, Pingyao Town, Yuhang District, Hangzhou City, Zhejiang Province, China
E-mail: China_vending@163.com
WebSite: https://www.chinavendingmachine.com/
